Contextual advertising, such as Google Adsense, is among the best monetization methods for many blog owners. If you have a blog that drives thousands of monthly traffic, you can earn significant money from selling advertisement space on your blog.
However, due to the large-scale fraudulent activities in the field, protecting both the publisher and advertiser becomes necessary. This is where a simple yet powerful technology comes in.
You need an Ads.txt file to protect yourself, the publisher, and your advertisers from advertising fraud.
But as simple as it is, how to add Ads.txt file to WordPress blogs can be challenging for beginners.
In today’s WordPress tutorial, I will guide you through the step-by-step process of adding ads.txt files to a WordPress blog without complex processes.
Before we dive in, let’s discuss in more detail what an ads.txt file is and why you need to add the code to your blog.
What is Ads.txt
Ads.txt is a small plain text file that publicly declares ad agencies, companies, and partners authorized to sell advertising space on your WordPress sites.
Ads.txt, which stands for Authorized Digital Seller, is like a public digital registry informing advertisers and platforms which company has the right to sell and place ads on your blog.
The IAB TECH LAB initiated it to help combat advertising fraud and ensure only sellers you’ve identified and authorized have access to place ads on your site.
Why You Need Ads.txt File
You might have guessed why the Ads.txt file is critical to publishers and advertisers.
Ads.txt file helps improve transparency between publishers and advertisers, which can increase your website’s reputation. This is because some unauthorized company might pretend to have your permission to sell ads on your website.
This can lead to displaying harmful and misleading information on your site, negatively impacting the user experience and everyone’s safety.
So, the Ads.txt file adds extra security layers, reducing the chances of unauthorized sellers attempting to sell ad space on your blog.
It can also help you increase advertising revenue by blocking fake ad traffic and impressions and eliminating invalid clicks.
In a nutshell, Ads.txt stops unauthorized ads from appearing on your site and ensures that only allowed lists of advertising companies place ads on your site.
1. Adding Ads.txt File to Your WordPress Site (Plugin)
Ads.txt file manager plugin is the easiest way to add Ads.txt file to WordPress sites. This is a beginner’s approach and the most recommended solution.
Unless you’re comfortable editing theme and core WordPress files, you don’t have to touch a single line of code to add the file to your site.
There are several of these plugins in the WordPress plugin repository, many of which are free. So, you don’t even need a paid plugin to add the file.
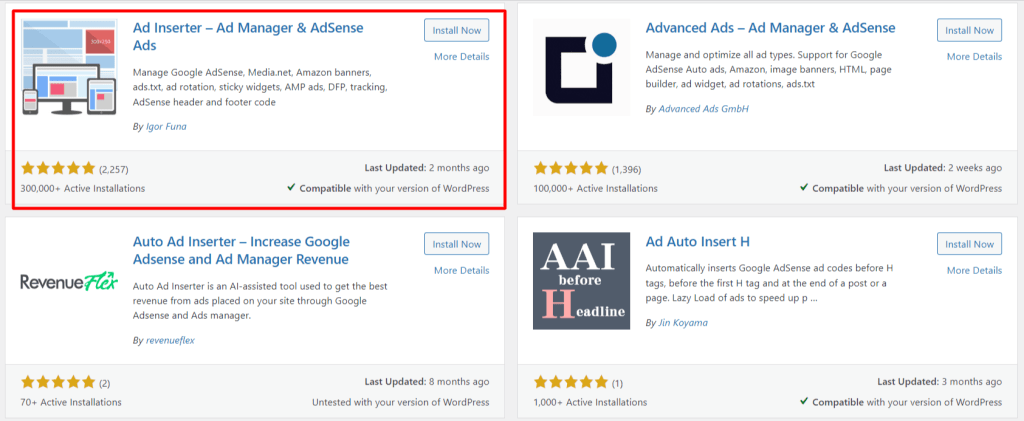
For demonstration purposes, I will be using the Ad Inserter WordPress plugin.
Ad Inserter is a multipurpose ads and codes management plugin; it supports several advertising platforms, such as Google Adsense, Amazon Native Shopping ads, Media.net, Infolinks, etc.
You can also manage analytics code and affiliate links with it, such as Google Analytics, Bing Analytics, Facebook ad script, banner ads, and many more. It is an advanced plugin that lets you manage and insert code like PHP, HTML, CSS, JavaScript, and text anywhere on the website, including sidebars, headers, footers, content bodies, etc.
Follow the step-by-step guide below to install, activate, and add an Ads.txt file to your WordPress blog.
Go to your WordPress admin dashboard and navigate to Plugins on the menu list. Select Add New Plugins from the option.
Type “Ad Inserter” into the search box on the plugin list page. Click the Install button, followed by Activate. For more details on installing and activating the WordPress plugin, follow our beginner’s guide here.

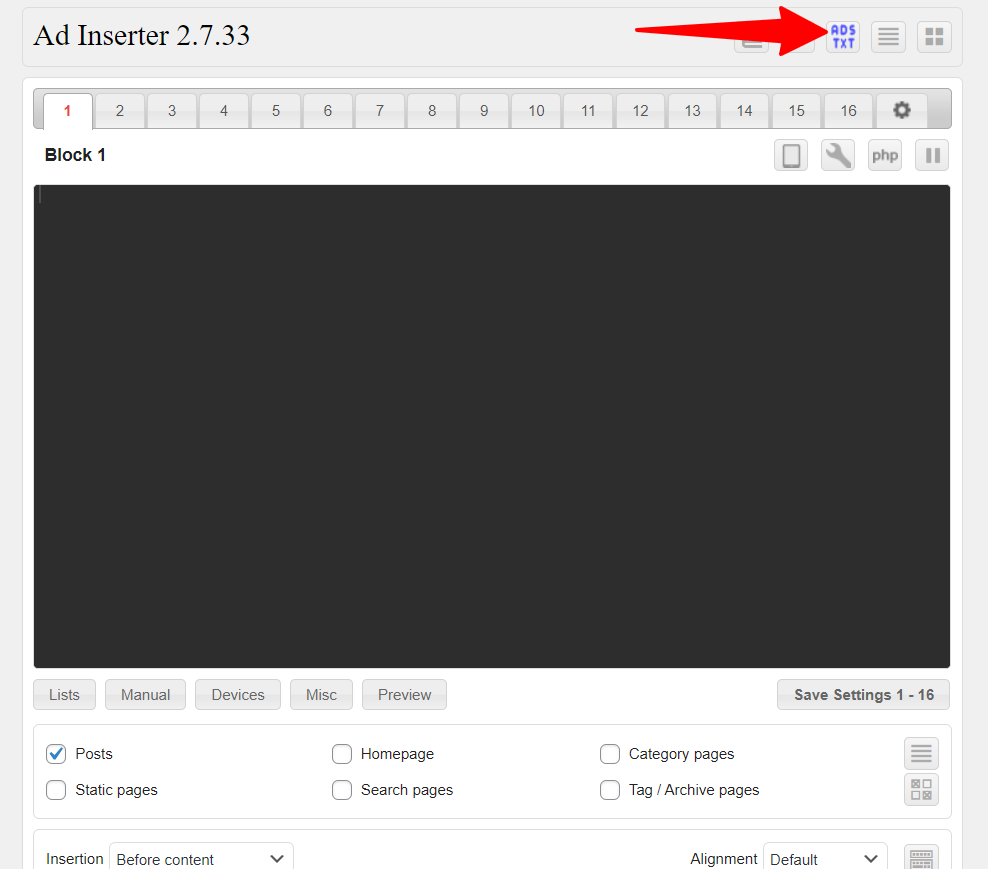
After the Ad Inserter plugin is activated on your website, go to its settings page and open the plugin.
Here, you can see the plugin already has the option or feature for adding the Ads.txt code file to your WordPress blog.

What you need to do here is to click the button. (As shown in the above image).
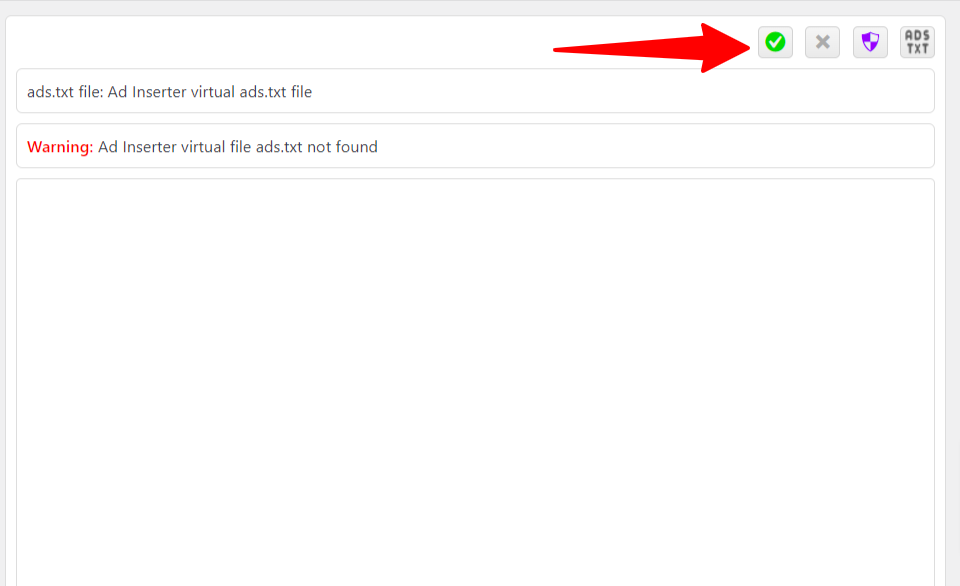
After clicking this button, scroll down the page a little to see a box where you will enter the text file.

What you need to do here is to enter your Ads.txt file information into the empty area. You must get the information from your advertising agency, such as Google Adsense, Media.NET, and the rest.
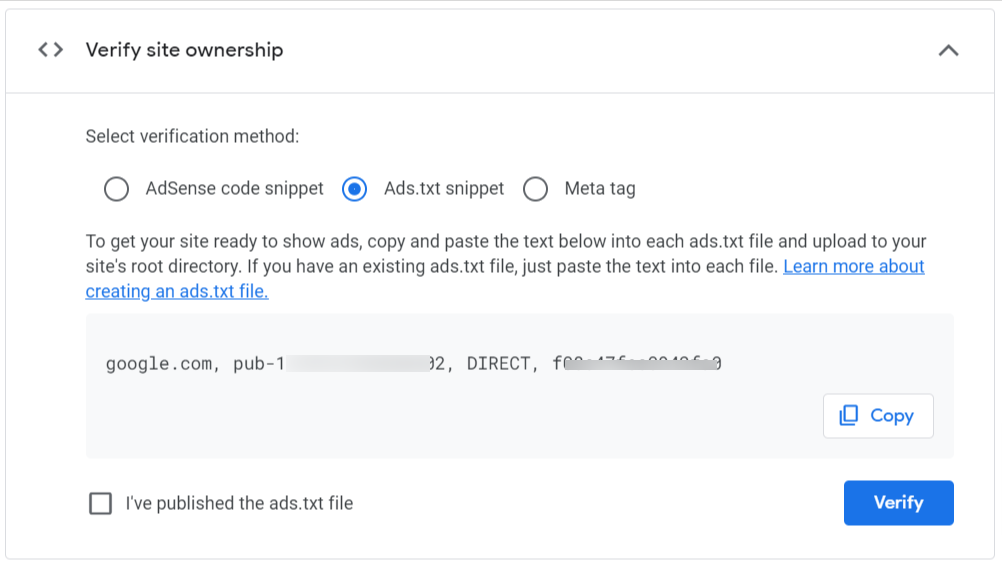
Most advertising companies provide you with this info. But in case otherwise, here is what an Ads.txt file looks like and the information it contains.
Let’s use Google Adsense as an example. Here is how the Adsense Ads.txt looks:

google.com, pub-0000000000000000, DIRECT, f08c47fec4941fa0.Let’s break the information in these ads.txt snippets for you to understand.
The domain (google.com) is the verified or authorized seller or reseller for your ads on your blog. Pub-0000000000000 is your publisher ID, which is unique to your account with the ad company.
Next, you need to specify your relationship with the Ad TECH company. Here, DIRECT means you transact or work directly with an Ad company. The relationship can also be RESELLER, which means the publisher has authorized a third-party ads vendor to sell ads on their behalf.
The last part of the Ads.txt data is the ID of the advertising platform you’re working with. This field is optional. You can add it if you have it.
Once you have this information, add it to the Ad Insterter’s Ads.txt text editor.
Note: Enter the ads.txt file information in the order shown here to work properly. I.e., the domain part must come first, followed by the publisher ID, relationship, and platform ID.
You can add several ad tech companies’ ads.txt info you work with to the editor. The only requirement is to ensure each ads.txt information for an ad vendor is entered on its line.
Remember to click the Save button in the Ad Insterter when you’re done. Now, you can view the ads.txt file within your website’s root directory.
Type your domain.com/ads.txt to view the file. Everything is correct if you see the information you just entered. Alternatively, you can view the file directly from the Ad Inserter plugin by clicking the ADSTXT button.
2. Manual Code Insertion
Another way to add an ads.txt file to WordPress blogs is by adding the code directly without a plugin.
For users comfortable with code editing, this method allows direct insertion of the ads.txt code into your website’s files. However, it’s recommended for advanced users only, as it requires accessing and editing core WordPress files.
Here are the steps to follow.
1. Accessing Your WordPress Files:
- Use an FTP client like FileZilla or your web host file manager to access your website’s files.
2. Editing the header.php File
- Locate the header.php file within your theme’s folder.
- Download the file to your local computer for safe editing.
- Open the file in a code editor like Notepad++ or VS Code.
3. Adding the ads.txt Code Snippet
- Find the <head> section of the code.
- Before the closing </head> tag, paste the following code snippet, replacing the bracketed placeholders with your information:
<link rel=”ads.txt” href=”https://[YOUR_DOMAIN_NAME]/ads.txt” type=”text/plain”>
4. Uploading the Edited File
- Save the changes made to the header.php file.
- Upload the modified file to its original location on your web server.
5. Creating the ads.txt File
- Create a new plain text file named ads.txt (lowercase and without extensions).
- Open the file and enter the information for each authorized seller, following the same format as in the plugin method. Remember the format (google.com, pub-0000000000000000, DIRECT, f08c47fec0942fa0)
- Save the ads.txt file in the root directory of your website (where your index.php file is located).
That’s it. Now you know how to add ads.txt file in WordPress with or without a plugin.
Conclusion
Adding the ads.txt data to your site is crucial if you sell ad space on your blog. For various reasons, it is one of the first steps you should take when selling ads and working with ad tech companies like Google.
At first, you might think adding an ads.txt file to your WordPress blog is challenging. But after reading this guide, I hope you can do it yourself.
Let me know in the comment box below if you have other questions or need help adding ads.txt files to your WordPress blog.


