
If your WooCommerce store takes more than a couple of seconds to load, you’re losing sales right now. Not eventually. Right now, while a customer is staring at a blank screen and deciding whether to wait or hit the back button.
Here’s the thing about WooCommerce specifically: it’s not a static blog. Every product page, every cart update, every checkout step involves your server talking to a database in real time.
That makes WooCommerce stores naturally heavier and slower than a regular WordPress site, which is exactly why generic “speed up WordPress” advice only gets you halfway there.
This guide walks through what actually works for WooCommerce, in the order that gives you the biggest wins first. No fluff, no 47-tab plugin comparisons you’ll never finish reading.
Why WooCommerce Speed Is Different (and Why It Matters More)
A normal WordPress page can be cached and served as a static file to every visitor. WooCommerce can’t do that with everything.
Your cart, checkout, and account pages change based on who’s looking at them, so parts of your store have to be rebuilt on the fly for every single visitor.
That means the usual caching plugin isn’t enough by itself. You need hosting and configuration that specifically account for these dynamic requests, or you’ll hit a wall no amount of image compression will fix.
And the stakes are higher than they look. Google and Deloitte found that shaving just 0.1 seconds off mobile load time lifted retail conversion rates by 8.4%.
On the flip side, research consistently shows that the odds of a visitor abandoning your site climb sharply as load time creeps past 2 to 3 seconds. For a store, that’s not a bounce rate problem. That’s lost revenue you can put a dollar figure on.
Before starting to speed up your WooCommerce store, run your site through a couple of these tools so you have an optimization baseline:
Test a product page and your cart or checkout page separately. They behave very differently, and optimizing only your homepage can leave your actual buying flow just as slow as it was before.
Now that you have a baseline to work with, let’s start optimizing your WooCommerce store for speed.
1. Fix Your Hosting First
Every credible source on WooCommerce performance optimization agrees on this: hosting is the ceiling on everything else you do.
You can compress every image on your site and still have a slow store if your server can’t handle dynamic requests efficiently.
Shared hosting is the usual culprit. It’s built for low-traffic blogs, not stores that generate database queries on every cart update. If you’re on a shared hosting plan and struggling with speed, that’s very likely your actual problem, not your theme or your plugins.
What to look for in WooCommerce hosting:
Cloudways is worth a look here. It runs on cloud infrastructure with NGINX, Apache, and MySQL/MariaDB tuned specifically for WooCommerce. And its own Breeze caching plugin already knows how to leave your dynamic pages alone.
Kinsta and Pressable are other strong choices. Both web hosts are built on powerful server infrastructure and offer account resource limits for WooCommerce performance.
They’re managed WordPress hosts built specifically for WordPress and WooCommerce that take server-level optimization off your plate entirely, which is worth paying for if performance tuning isn’t how you want to spend your time.
2. Choose a Genuinely Lightweight Theme
A theme with a beautiful demo isn’t the same thing as a fast theme. Plenty of premium WooCommerce themes ship with page builders, animation libraries, and icon sets loaded on every single page, whether you use them or not.
Before you commit to a theme, load its demo site into PageSpeed Insights or your preferred testing tool. That five-minute test will tell you more than any features list.
Themes with a track record for speed on WooCommerce stores include GeneratePress, Astra, and Kadence.
All three are built to work with the WordPress block editor rather than requiring a heavy page builder, and all three keep their base CSS and JS footprint small. Astra, specifically, is less than 50KB and is constantly updated.
If you’re already leaning on a page builder like Elementor for flexibility, that’s fine; just know it’s adding weight you’ll need to account for elsewhere.
3. Get Serious About Caching
Caching is the single highest-leverage thing you can configure after hosting. It stores a ready-made version of your page so the server doesn’t have to rebuild it from the database on every user visit.
The catch with WooCommerce is that you can’t cache everything the same way your shop and category pages can be cached like normal content.
Cart, checkout, and my-account pages need to stay dynamic; otherwise, a customer will see stale cart totals or someone else’s order history.
A good caching plugin handles this distinction automatically.
WP Rocket is a solid choice here. It’s the plugin most people default to once they outgrow the basics, largely because the default settings already know how to treat WooCommerce pages correctly.
NOTE:
Once you’ve installed WP Rocket, check out our complete WP Rocket settings guide to configure it correctly the first time, rather than leaving performance on the table with the defaults.
WP Rocket also bundles JS/CSS optimization, database cleanup, and MCP connector (for AI integration) into the same plugin instead of requiring you to piece together three separate tools. This alone saves you some money that would’ve otherwise been spent on buying another plugin.
In your caching plugin, set your cache expiration to around a month rather than a year.
Static content sites can cache for longer, but WooCommerce stores change often enough (new products, stock updates, price changes) that a shorter cache lifetime keeps things accurate without hammering your server with rebuilds every day.
4. Compress and Serve Images Properly
Product images are usually the single heaviest part of any WooCommerce page, and it’s not close. A store with 200 products and multiple images per product can easily be carrying tens of megabytes of unoptimized photos across its catalog.
Image optimization has four parts, and skipping any one of them leaves performance on the table:
Imagify handles these optimization tasks, except lazy loading, in one plugin and pairs naturally with WP Rocket if you’re using it. Both plugins come from the same team and are built to work together, since WP Rocket includes lazy loading.
Whatever tool you pick, run a bulk optimization pass on your existing media library, not just new uploads going forward. Old, unoptimized images sitting in your product catalog are dead weight you’re paying for on every page load.
5. Add a CDN
A content delivery network (CDN) stores copies of your static files (images, CSS, JavaScript) on servers around the world, so a visitor in London isn’t waiting on a response from a server sitting in Ohio.
If you sell only to a local audience within one country, a CDN matters less. If you have any international traffic at all, it’s one of the more noticeable speed wins available.
Several hosts now bundle CDN in for free rather than charging separately for it.
Kinsta, WP Engine, and Pressable all include a built-in global content delivery network.
If you’re not using any of these hosts, check what your host already includes before signing up for a third-party CDN service, since you may already have access to one without knowing it.
6. Clean Up Your Database
Every product edit, every abandoned cart, every plugin you’ve ever installed and removed leaves something behind in your database. Over time, this adds up: old post revisions, expired transients, orphaned tables from long-deleted plugins, and abandoned cart sessions that never got cleared out.
A bloated database means every query, including the ones that build your product pages, takes longer to run. The fixes here are mostly one-time cleanups plus one ongoing habit:
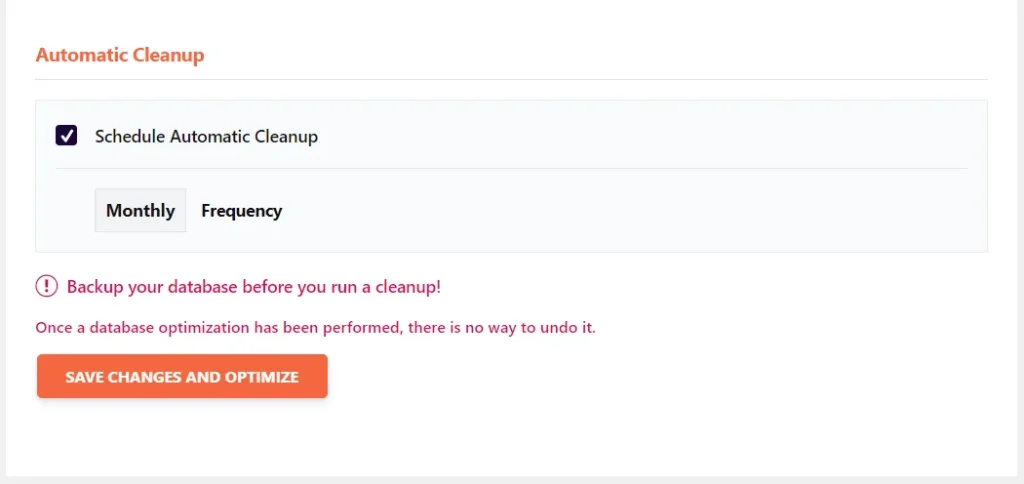
WP-Optimize is a solid free option for this if your caching plugin doesn’t already include database cleanup tools. Schedule it to run automatically rather than relying on remembering to do it manually.
NOTE:
WP Rocket include built-in database optimization tool, so you don’t have to install or buy an extra plugin for what it already bundles together.
7. Increase Your PHP Memory Limit
WordPress defaults to a fairly small memory allocation, which is fine for a simple blog but often not enough for WooCommerce stores once you factor in product variations, extensions, and a decent-sized catalog.
You can adjust this up to at least 256MB by adding the following line to your wp-config.php file, above the line that says “That’s all, stop editing!”:
define('WP_MEMORY_LIMIT', '256M');WARNING:
Back up your site first. This is a low-risk change, but any time you’re editing a core file, a backup is cheap insurance.
Web hosts like Pressable offer 5 PHP-based workers and a 512MB memory limit per worker. This is more than enough for most WooCommerce stores running a thousands-product catalog and hundreds of concurrent users.
If you’re on such a host, you don’t need to manually adjust the wp-config.php file; the hosting resource is more than enough.
8. Trim Your Plugins and Extensions
It’s not really about the number of plugins you have installed. It’s about what each one is doing on every page load, whether you actually need it there or not.
A plugin that adds its scripts and styles to every single page, even pages where its feature never appears, is quietly taxing every visitor’s load time for functionality most of them will never touch.
Query Monitor is a free plugin that shows you exactly which plugins are slow, how many database queries each one triggers, and where your load time is actually going instead of where you assume it’s going.
Once you know which plugins are the problem, you have two options: replace them with lighter alternatives, or use an asset management plugin like Perfmatters or Asset CleanUp to stop specific scripts from loading on pages that don’t need them.
A contact form plugin, for instance, has no reason to load its JavaScript on your product pages. It should only load its script on your contact page, and anywhere the contact form is added.
9. Disable the Cart Fragments Request (If You Don’t Need It)
This one’s specific to WooCommerce and rarely mentioned outside of dedicated WooCommerce speed guides.
WooCommerce uses an AJAX request called get_refreshed_fragments to update your cart contents dynamically without a full page reload. This sounds great in theory, but can add real, measurable delay on every page load, particularly on modest hosting.
If your theme doesn’t rely on a live cart count in the header (or you’re willing to let it refresh on page load instead of dynamically), a plugin like Disable Cart Fragments can remove this request from pages where it isn’t needed.
Just be sure to test your cart and checkout flow afterward, since some theme features do genuinely depend on it.
10. Minify and Defer Your Code
Every CSS and JavaScript file your site loads adds a bit of delay before a page becomes usable. Minification strips out unnecessary spaces, comments, and formatting from your code, which browsers don’t need to render your page but still have to download.
Deferring goes a step further for JavaScript specifically: scripts that aren’t critical for the initial page render (chat widgets, analytics trackers, and the like) can load after the important content, rather than blocking it.
Most modern caching plugins, including WP Rocket and NitroPack, handle minification and deferral through simple toggle switches rather than requiring you to edit code directly.
Turn these on, then check your site visually afterward. Combining and minifying CSS/JS occasionally breaks a theme’s styling, so a quick before-and-after look is worth the two minutes it takes.
11. Move to HTTP/3 If Your Host Supports It
HTTP/2 has been standard for years now, and most hosts already support it. HTTP/3 is the newer version, built to reduce connection delays and handle multiple requests more efficiently.
It’s particularly useful for a store like yours that’s serving a lot of images, scripts, and stylesheets on every page. You won’t need to configure anything on your end.
This one lives entirely on your host’s infrastructure, so check whether your current host supports it, and if you’re shopping for new hosting, add it to your checklist.
12. Run Latest PHP Version
If you’re still running an older PHP version, this is one of the easiest wins available, and it costs you nothing.
Each latest PHP version has brought meaningful speed improvements over the last one. So running an outdated version leaves real performance on the table for no benefit at all.
Most hosts let you switch PHP versions from your hosting dashboard in a couple of clicks.
Do it during a low-traffic window and check your site immediately afterward. Older plugins occasionally have compatibility issues with newer version of PHP, so this is worth testing rather than assuming.
13. Make Checkout as Simple as Possible
Speed isn’t only about how fast your pages load. It’s also about how quickly a visitor can actually complete a purchase once they’ve decided to buy, and a bloated checkout process bleeds sales just as effectively as a slow server does.
14. Test on Mobile, Not Just Desktop
More than half of ecommerce traffic worldwide now comes from mobile devices. Mobile shoppers also convert at meaningfully lower rates than desktop shoppers, largely because mobile experiences are so often the neglected half of the testing process.
Run your PageSpeed Insights test on mobile specifically, not just desktop.
It’s common to see a healthy desktop score sitting next to a mobile score in the 40s or 50s on the exact same page. This is because testing tools hold mobile connections and processing power to a stricter standard.
If that gap shows up on your store, your images, fonts, and third-party scripts are the first places to look.
15. Update Everything, on a Schedule
Outdated plugins, themes, and WordPress core aren’t just a security risk. They’re also missing whatever performance improvements the developers have shipped since your last update.
And in some cases, an old plugin actively conflicts with newer WordPress or PHP versions in ways that quietly slow your whole site down.
Set a recurring reminder, weekly or biweekly, to check for and apply updates on a staging copy of your site first if you have one available. If a plugin hasn’t been updated by its developer in over a year, that’s worth treating as a red flag regardless of how well it currently seems to work.
Putting It All Together
If you only have an hour to spend on this today, do these three things in order: check your hosting, install a proper caching plugin configured for WooCommerce, and run a bulk image compression pass.
Those three alone typically account for the bulk of the improvement most stores see.
Everything else on this list is worth doing eventually, but hosting and caching are the foundation.
Optimizing images on a store that’s still running on underpowered shared hosting is a bit like changing your car’s oil when the real problem is a cracked engine block.
Test before and after every significant change using the same tool each time, ideally testing both a product page and your checkout flow.
That’s the only way to know whether a given fix actually moved the needle for your specific store, rather than just matching what worked for someone else’s.